Showing posts with label Free Pattern. Show all posts

Monday, January 23, 2012

FO & Free Pattern: T-shirt Yarn Pillow


This pillow was a quick knit thanks to size 19 needles and the thick t-shirt yarn I made the other day (directions here).

To make one, you will need:

Approximately 6 balls of t-shirt yarn (6 t-shirts worth). I used various shades of beige and white.
Size 19 needles
Darning needle
A square pillow insert (I used an old one I had lying around and just removed the cover)

Cover:

Front: Cast on 55 sts.
Row 1: k27, pm, k1, pm, k to end.
Row 2 (RS) (decrease row): K to 2 sts before marker, ssk, sm, k1, sm, k2tog, k to end.
Row 3: knit
Row 4:(RS) decrease row): K to 2 sts before marker, ssk, sm, k1, sm, k2tog, k to end.
Row 5: knit
Row 6: (RS) (decrease row): K to 2 sts before marker, ssk, sm, k1, sm, k2tog, k to end.
Row 7: purl

Repeat rows 2-7 until 3 sts remain. Remove markers, then slip 1, k2tog, psso. You will have one stitch remaining. This will be the center stitch on the mitred square that will form the back of your pillow cover. Cut yarn.

Back:

Now, starting at the corner to the right of your center stitch, with the right side facing up, pick up and knit 27 stitches along the right side of your square, pm, knit the center stitch, pm, and then pick up and knit 27 stitches along the top of your square. You are now ready to knit the mitred square for the back:

Row 1: k27, pm, k1, pm, k to end.
Row 2 (RS) (decrease row): K to 2 sts before marker, ssk, sm, k1, sm, k2tog, k to end.
Row 3: knit
Row 4:(RS) decrease row): K to 2 sts before marker, ssk, sm, k1, sm, k2tog, k to end.
Row 5: knit
Row 6: (RS) (decrease row): K to 2 sts before marker, ssk, sm, k1, sm, k2tog, k to end.
Row 7: purl

Repeat rows 2-7 until 3 sts remain. Remove markers, then slip 1, k2tog, psso. You will have one stitch remaining. Cut yarn and weave the tail through the remaining stitch.

Weave in all ends.

Your pillow cover will be connected to the front on two sides, so you can slip your pillow insert inside, like this:


To finish, take a long length of t-shirt yarn and your darning needle. Starting on the bottom right corner, seam together the open sides of the pillow.

Enjoy!

Wednesday, January 13, 2010

Cute Baby Pattern for Your Little Professor

I just saw this adorable (free pattern) and had to share it with our readers, for obvious reasons: it’s called the Baby Professor Vest. I love how the designer, Sam Lamb, describes the ideal color choices for this pattern: “Basically if it matches a corduroy jacket with elbow patches, let's just say it will be perfect.”

Wednesday, December 23, 2009

Inspired Knitting

Katie and I became friends while watching the TV show Bones. We both totally identify with the somewhat nerdy lead character, played by Emily Deschanel. So I was pumped to find this series of patterns, designed by Liz Abinante. (I can’t believe I just notice these now—these patterns have 1000s of hearts and tons of projects on Ravelry)!!!

First, there’s “Temperance” (named after Temperance Brennan, or “Bones”):

Next, there’s “Traveling Woman,” inspired by the character Angela:

And last, there’s “Saroyan,” inspired by Dr. Camille Saroyan:

These projects are a great testament to the strong female characters on the show. (We highly recommend it, in case you haven’t seen it!) Best of all, these patterns are all free!

Tuesday, December 22, 2009

Free Pattern: Grewyacke Mittens

After designing my Grewyacke Cowl, I wanted mittens to match, so I whipped up these quick, chunky mittens.

The bulky yarn (I used Cascade 128 held double-stranded) protects you from the elements. I’m home in Canada for the holidays, and these really do the trick. Thanks to our new stray (who needs a name!) for modeling with me. (My parents live on a farm, where there’s a large harem of kitties to keep the mice at bay).

IMG_0901

Materials:

Yarn: Approximately 150 yards of bulky weight yarn, held double-stranded. Shown in Cascade 128 (100% wool; 100g/128yd per skein) in natural (#8010).

Other options: Lion Brand Wool-Ease Thick & Quick, Rowan Big Wool, or Brown Sheep Burly Spun (held single-stranded)

Needles: Size 13 circular needles (two pairs) (for double circular method)

Size 11 circular needles (two pairs) (for double circular method)

OR DPNs in sizes 11 and 13 if you prefer.

Notions: stitch markers (3), yarn needle for weaving in ends, cat for modeling photos (optional)

Gauge: 3t/inch in Greywacke stitch pattern.

Sizing: S/M [M/L]

Directions:

Cuff:

Using size 11 needles, cast on 15[18] sts. Distribute across two sets of size 11 circulars for double circular methods (or DPNs if you prefer).

Begin working in k1, p2 rib for 11 rounds.

On the next round, expand 3 stitches as follows: kfb, p2, *k1, p2: rep from * to last 3 stitches, k1, pfb, kfb. 18[21] sts total.

Begin pattern as follows:

Round 1: p1, *k1, p2; repeat from * to 2sts before end of round; end k1, p1.

Round 2: set up thumb gusset shaping: k1, pm, *knit to 2 sts before end of round, pm, k2.

Round 3: Begin thumb gusset increases: kfb, sm, *p2, k1; rep from * to marker, sm, pfb, kfb.

Note: The thumb gusset stitches may not really follow the Greywacke stitch pattern—I tried my best. Once you separate the thumb, you can resume the Greywacke pattern. No one will notice if it's a bit wonky).

Round 4: Knit.

Round 5: k1, pfb, sm, p1, *k1, p2; repeat from * to end of round (you'll end with a k1, p1); sm, kfb, p1, kfb, p1.

Round 6: Knit.

For size S/M: Knit to end of round, then place 9 thumb stitches onto scrap yarn. Move to Work Hand, below.

For size L/XL:

Do one more increase row, as follows: p1, k1, pfb, sm, *k1, p2; repeat from * to 2 sts before marker, end k1, p1; sm; end pfb, k1, p2, k1, p1, kfb.

Knit one round, then place 12 thumb stitches onto scrap yarn.

Work Hand:

For all sizes: Work hand portion in Grewyacke pattern until mittens just covers the fingertips.

Size S/M will begin on Round 1; size L/XL will begin on round 3.

Round 1: *k1, p2; repeat from * to end of round

Round 2, 4, and 6: knit

Round 3: p2, *k1, p2; repeat from * to end of round; end k1.

Round 5: p1, *k1, p2; repeat from * to end of round (you'll end with a k1, p1).

Try to finish on an odd-numbered row.

On the next even round, ktog across row (size L/XL will have on extra stitch).

Then, p2tog across row (size S/M will have one extra stitch).

Cut yarn, then place on a darning needle and draw end through the remaining live stitches. Push needle through to the wrong side of the mitten and weave in the end.

Thumb:

Place thumb stitches onto two size 11 circular needles (or DPNs, if desired).

Begin working in Grewyacke pattern (try to figure out the best row to start on, or just restart the pattern—it's no big deal), as follows:

Round 1: *k1, p2; repeat from * to end of round

Round 2, 4, and 6: knit

Round 3: p2, *k1, p2; repeat from * to end of round; end k1.

Round 5: p1, *k1, p2; repeat from * to end of round (you'll end with a k1, p1).

Continue until it is just long enough to cover the thumb. Try to end on an odd-numbered round.

Next round: k2tog across round (you may have one lonely stitch left over).

On the following round, p2tog across round (you may have one lonely stitch left over).

Cut yarn, then place on a darning needle and draw end through the remaining live stitches. Push needle through to the wrong side of the mitten and weave in the end.

Finishing:

Weave in all ends. To fluff up the yarn, spritz the mittens with water and toss in the dryer for a few minutes.


mittens2

Happy holidays everyone!

Friday, December 18, 2009

Free Pattern: Greywacke Cowl


touse1

Greywacke is a thick, chunky cowl inspired by sedimentary rocks composed of feldspar, quartz, and clay. They are commonly found in Wales, Scotland, Ireland, and England, where a cowl like this would usefully shield you from the wind and rain.

Materials:

Yarn: Approximately 300 yards of bulky weight yarn, held triple-stranded. Shown in Valley Yarns Berkshire Bulky (85% wool/15% alpaca; 100g/141yd per skein) in Grey (above) and Cascade 128 (100% wool; 100g/128yd per skein) in natural (#8010) – below.

Other options: Cascade Magnum, Twinkle Soft Chunky, Classic Elite Aspen or any super-bulky yarn, held single-stranded.

Needles: Size 19 circular

Notions: stitch marker, yarn needle for weaving in ends.

Gauge: Not crucial, but approximately 1.5-2st/inch in Greywacke stitch pattern.

touse2

Pattern:

Greywacke is knit in the round, using a simple pattern.

Cast on 48 stitches using long-tail method.

Optional: To make the twist (shown in the cream colored version), rotate the first stitch one full turn around the needle.

Place marker, and join to work in the round.

Knit 1 row, then begin pattern, which is a 6 row repeat:

Row 1: *k1, p2; repeat from * to end of round

Row 2, 4, and 6: knit

Row 3: p2, *k1, p2; repeat from * to end of round; end k1.

Row 5: p1, *k1, p2; repeat from * to end of round (you'll end with a k1, p1).

Repeat Rows 1-6 until cowl measures approximately 8” in length.

Bind off.

Finishing

Weave in ends. You may also spritz the cowl with water and toss it in the dryer for a few minutes to make it softer and denser.

Friday, October 10, 2008

Free: Crochetastic Tote


First of all, new word: Crochetastic. Crocheting with plastic bags. And it's fantastic.

Here's a more specific pattern for a purse/bag, with more detailed numbers than the general bag recipe in the last post on this subject. That post also has instructions for making yarn out of plastic bags.


Free Pattern: Crochetastic Tote

Materials
Crochet hook, size P
Scissors
Brown/Tan grocery bags, XXX grams. This works out to be 3 basketball-ball sized balls of yarn--WAY more than you think.
Note on yarn thickness: Cut the plastic bags into loops that are between 2 and 2.5 inches wide. See my earlier post for instructions on making the yarn.
Optional: White grocery bags, if you want stripes. About a softball sized ball of yarn.

Skills Required
Chain crochet stitch
Single crochet stitch, worked flat
Single crochet stitch, worked in the round
Single crochet decreases.

PATTERN

Bottom of bag: Chain 20, turn. Work flat in sc for 8 rows. Down forget your turning stitch.

At end of 8th row, turn, and work down short side for 8 sts. Turn again, work down long side for 20 sts, then turn once more and work 8 sts along the second short side. You are now back at the beginning of the round.

**Base of my bag is 14" long by 5" deep.

Work Body: Work bag in the round for 17 inches, for a tall tote like mine. Add stripes if you want--I put in 2 rows of a white bag yarn to create the stripe near the top of my bag.

Decreases: 5 rows before the start of your handles, you need to add a few decreases. As you can see from my bag, the decreases don't look like decreases--the bag tends to fan out, though, and the decreases make it look straight on the sides.

Work a one stitch decrease at each end of the bag (on the "short" sides), 2 dec per round. Decreases work like this: sc, skip 1 st, sc. The next round, sc as normal. Then work one more dec round. 4 total sts decreased. Work 2 more rounds in regular sc, then start the handles.

Work handles: At start of next round, beginning on a long side, work 7 sc sts. Then, chain 6 sts. Skip 6 sts on fabric, reconnect and work to the end of the long side--7 sts--then across the short side--8 sts--then 7 sts down the second long side. Chain 6 sts, skip 6 sts on fabric, reconnect, and work sc to end of round.

Work regular sc for 3 more rounds. Break yarn. Weave in ends.

Done!

Wednesday, August 13, 2008

Teddy Bear Rollneck Sweater – Free!

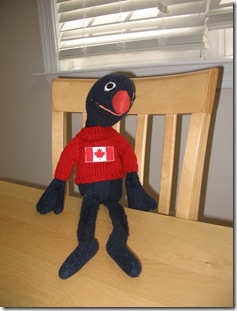
This summer Grover received this lovely sweater as a gift.

Summer 2008 046

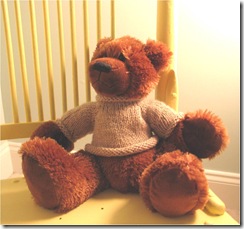
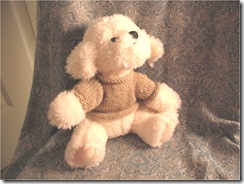
He liked it so much he asked for another sweater to wear. So I designed the Teddy Bear Rollneck Sweater:

rollneck

The Teddy Bear Rollneck Sweater is worked from the top down, using raglan shaping. No seaming required! The rollneck is simply formed by knitting everything in stockinette, with no ribbing or borders. This makes it a super easy and quick knit, because after all… it is for a teddy bear.

GAUGE:
18 sts & 26 rows over 4”

FINISHED MEASUREMENTS:
Approximately 4 inches long and 6 inches wide. Should fit any medium‐sized bear. (For reference, the bear in the picture measures about 8” tall when sitting).

MATERIALS:

Needles:

Size 8 (5mm) circular needles (16”)

AND EITHER an additional size 8 (5mm) circular

OR double-pointed needles in size 8 (5mm)

Paton’s Classic Wool Merino, approximately ¼ skein (or probably less). Any worsted weight yarn will do. Shown in 00229 (Natural Mix).

PATTERN NOTES:

The Teddy Bear Rollneck Sweater is worked from the top down, using raglan shaping. No seaming required! The rollneck is simply formed by knitting everything in stockinette, with no ribbing or borders. This makes it a super easy and quick knit.

PATTERN:

Using doublepointed needles or double circular method, cast on 36 stitches. Join to work in round. To shape the collar, knit in stockinette stitch for 9 rounds.

Begin raglan shaping:

Place markers: k3, pm, k12 (front), pm, k6, pm, k12 (back), pm, k to end of round.

Start raglan increases: *k to 1 st before marker, kfb, sm, kfb; rep from * to last marker, k to end of round.

Repeat raglan increases on every round for 8 rounds.

Separate sleeves: Place sleeve stitches on scrap yarn.

Join and work body in round for 2.5” or until desired length. Bind off.

Using doublepointed needles or double circular method, move sleeve sts from scrap yarn to needles and begin working in stockinette stitch. At the end of the first round, pick up 7 stitches under armpit. Continue working in stockinette stitch, only decrease two stitches on the following row and every other row for 3 times total , as follows: K1, k2tog, knit to last three stitches of round, ssk, k1.


Continue until sleeves measure 2” from armpit, or desired length. Bind off.

FINISHING:

Weave in ends. Block if desired. But seriously, are you really going to block something that goes on a stuffed animal?

rollneck4

Thursday, August 7, 2008

Recycled Plastic Bag Crochet Tote - free pattern recipe

[NOTE: Photographs will be added soon.]

There are a lot of patterns and instructions for recycled plastic bag crochet out there, I'm just adding to the fun with this post and pattern.

This is a bag that I assisted my friend C. in making: a market bag with long straps, made of grocery bags (in white and brown) and target bags (the red speckles).

plastic+crochet+carryall.jpg


There are two reasons to crochet with plastic bags that currently apply to me: (1) because a crafter is on a yarn-purchase moratorium because said crafter's HVAC needs to be replaced, and (2) because a crafter wishes to be eco-friendly in a really flipping fun way.

What you need for plastic bag crochet

1) plastic bags - way more than you think
2) crochet hook - larger the better (within reason)
3) scissors - for cutting plastic bags

Overview

Crocheting with plastic bag yarn is a two-step process. First, you have to make the yarn, then you have to crochet it into a project of your choice. Projects can be bags (a postmodern reconfiguration of a highly wasteful object into one that we dub "eco-friendly"), bath mats, doggie beds, or anything else.

MAKE THE YARN

The yarn-making process involves cutting the bags into long loops of plastic, then threading the loops together to make a two-ply plastic yarn.

Get those bags and a pair of scissors. Lay a bag as flat as possible, then fold the bags in half length-wise twice or three times, until you can cut across the width with one snip of your scissors. First cut across the top to remove the handles. Then, cut across the bottom to remove the base. You now have a plastic tube which you will cut into loops.

A note about gauge

Depending on the size crochet needle you have, and your desired gauge, you can make this yarn thicker or thinner.

Another factor is the heft of the bags you are recycling. Some grocery store bags are much thinning than bags from department stores.

Here's a very arbitrary gauge chart, with suggested needles. The inch measurement refers to the width you will cut your loops:

.5"/thick bag or 1"/thin: Light weight. Size K (6-6.50)
1"/thick or 1.5-2"/thin: Medium weight. Size P hook. (10-11.5)
2"/thick or 2.5-3"/thin: Heavy weight. Size Q hook. (15-16)

When pairing yarn to your hooks, remember the proper pairing depends on (1) your personal crochet tension, and (2) how tight you want the work to be. I would suggest that you work this material tightly, though, to make a stronger fabric.

To attach the loops to make yarn

I know this sounds confusing, but it's a lot easier when you have the yarn in front of you to work with.

Lay one loop on the ground, then lay the second loop on top of it, overlapping slightly. Reach through the top loop and grab the edge of the bottom loop, pulling it through, and then thread this end over the top loop and through itself, i.e., through the bottom loop. Pull tightly, and the loop-over connects the two loops. Continue attaching the loops like this until you have a large ball. (And I mean large--like 1 foot in diameter.)

CROCHET THE BAG

I've prepared a simple bag pattern recipe. This is a tote with handles, not straps like the bag in the picture above.

The pattern presumes that you know how to single crochet flat and in the round.

Work the bottom of the bag

Chain (ch) about 16 inches. This length will be the width of your bag, so chain as many as you want depending on the size bag you would like to make.

Crochet flat with single crochet (sc) for 4-5 inches. This is the depth of your bag. Again, make it as large as you would like.

You will work the sides of the bag in sc. You will now work in the round, around the four sides of the rectangle you just made. As you work in the round, the bag will grow taller. Work for as long as you would like, creating the height of a bag you will want to use--18"-20" is what I recommend.

Work bag handles

First, you need to decide how wide you would like the handles to be.
Second, you need to figure out how to center that width on the width of your bag's long sides.

When you work the handles, you will sc as normal until the start of the handle, then ch as many sts as there are sts for the handle width, then reconnect and sc to the other handle location, repeat handle chain sts, and work to end of round.

The next round you will work in sc including across the chain.
Work in sc until the handle height measures 2-4 inches. Any less than 2 inches may sacrifice handle strength. Wider than 4 inches makes the handles difficult to grab.

You are finished! Tie off, weave in ends using your crochet hook.

Here's a ridiculous schematic I drew. I should stick to CAD software.

Crochet Bag Sketch.jpg

Monday, August 4, 2008

Free Pattern: Flower Power & Hexagon Crochet Coasters

Stupid Easy.

Hexagon Coaster,
or Flower-Power Coaster

DSC_0001.JPG


Materials:
Some worstedish weight 100% cotton
Shown here: Euro Yarns Brushstrokes Cotton in color #103. One skein (120 yards) will make a set of
USH8/5.00mm Crochet Hook

Chain six sts.
Join to work in a circle.
Round 1: Work 2 sc into all six sts.
Round 2: *sc, 2 sc into next st*; rep **
to end of round.
Round 3: *sc, sc, 2 sc into next st*; rep ** to end of round.
Round 4: *sc 3 times, 2 sc into next st*; rep ** to end of round.
Round 5: *sc 4 times, 2 sc into next st*; rep ** to end of round.
[For Flower Power, skip to separate instructions below.]
Round 6: *sc 5 times, 2 sc into next st*; rep ** to end of round.
For Hexagon, you are done.

DSC_0004.JPG


For Flower-Power:
Round 6: *ch 5, sc into 3rd st*; rep ** to end of round.

DSC_0003.JPG


Fini

A Hint: As the work grows, you are working 2 sc into the middle of the 2 sc on the row below. You don't really have to count st, just watch the row below for the st with 2 sc in it, and put 2 sc there.

Work it bigger to make a trivet or potholder.

Note: I hereby grant permission to members of the Durham String Thing knitting group to make these for our Centerfest Show sale and for charity sales.

Monday, July 14, 2008

Free Pattern: Julian's Blanket

[updated 14 Mar. 10]


I've been taking care of my sister's baby this summer, my nephew Julian. Are babies amazing knitting inspiration or what? I made him a blanket to roll around on while he visits me.


This is my first knitted blanket, because in the past I preferred to crochet them.

A few notes: I'm trying to make the move to a world in which I pay for my yarn exclusively through pattern sales. This might be wishful thinking, but so far it's working.

This means, though, that I don't get to run out and buy yarn a lot of the time--instead, I'm forced to raid my stash. This blanket was born of necessity, in some ways--I've never been able to give yarn away, no matter how much I can't stand it--so I pulled together all of this yarn that I've been either ignoring (the Caron, Microspun, and Cosetta) or fighting with (the Filatura Zarone) for months or years.

Some of this yarn is cheap stuff I bought when I was just getting started in fiber arts. The Zarone was not cheap; I did buy it on sale, though--in Japan at Okadaya craft store in Shinjuku. The Zarone has been knitted into various items, all of which were failures, and frogged again and again. I threw it in a plastic bag and wished it to Hades.

So, I pulled everything out again, made a huge pile on the floor, thought of a few design elements to guide me, and away I went. This only took a week to knit.

Basic instructions for Julian's Blanket
Finished size: 40" x 50"
Needles: Size 10/6.00mm circs
Yarn: Whatever!! Hold strands together so you get a gauge that is roughly 2.5 sts/inch
I used:
Filatura di Crosa Zarone (single-stranded) in red and maroon
Sensation's Cosette (double-stranded) in blue
Caron Simply Soft (3x) in beige
Lion Brand Microspun (4x) in black

Cast on 120 sts
Work 6 rows in garter st (3 garter ridges each side) in the color that will be your trim (TC in pattern)
Work body in stockinette st, changing colors every few rows. I worked in a random pattern of color and stripe width.
Finish with 6 rows garter st in TC. Finish on a RIGHT SIDE row. Do NOT bind off.

Side edging:
Using a size 6.00mm crochet hook and TC, do a row of single crochet along one side of blanket on the RIGHT side. Using crochet instead of regular picked-up knit sts creates a finished edge on both sides of the work, wrapping a band of the TC all the way around. When you get to the end, do NOT break yarn, instead, turn work over and on the wrong side, pick up sts in the crocheted loops. Work 4 rows in garter st., bind off.
Repeat for other side.

Done!

My husband says that this looks like a Mexican donkey blanket, and that may be true, but I still think Julian looks handsome on it.

Saturday, June 28, 2008

BRYHER Cable Scarf - Updated Version

Katie Rose here:

[updated January 2015]


Updated pattern PDF available as a $1 download from Ravelry, here.


Bryher is one of the first patterns I ever wrote. The first one I knitted (viewable here) was stolen from a restaurant—I left it on my seat, returned 15 minutes later to pick it up, and it was gone, gone from the restaurant completely. Here's a picture of the original:


Who would want to steal a handmade scarf? Until it disappeared, I wore the scarf every day. I made Madame Luscious to take its place, but the hole in my heart remained.

Enter Bryher 2.0. This time around, I've written a more complete pattern. I even made a PDF and put it on Ravelry as a free. The most recent update of the PDF includes a photo-tutorial on knitting cables without a cable needle, too.

Notes on the Pattern

Bryher 2.0 was knit with Idena "Mohair Lux" in colorway #4118, a green-purple variegation. (This replaced the Artful Yarns "Portrait" in the Madame X colorway from Bryher 1.0.)


This mohair is held with a Paton's Classic Wool Merino worsted-weight yarn in colorway Deep Olive, just like Bryher 1.0.

Needles are size 10 circulars. Scarf is worked in k1, p1 rib with a braided cable off-center. The first stitch of each row is slipped to create a selvedge.

Who is Bryher?

This scarf is named for the novelist Bryher.

Bryher was the pen name for Annie Winifred Ellerman, British novelist born in 1894. She was the life-long companion of the poet H.D. She was also very rich, and used her wealth to help Jews escape Germany in the 1930s.

A tough world traveler, she would have needed a compact, warm, yet stylish scarf like this one.


Check out other knitters' great projects on Ravelry using the link below.