Showing posts with label baby. Show all posts

Saturday, August 10, 2013

Nine Months of Crafting: High Contrast Mobile

[Jordynn here]

The Playard we got for Peapod came with a play gym/mobile set up, including the usual stuffed toys that go with such items. (They are on everything--the bouncer, the swing, etc.)


I decided to swap out those toys for something black and white for her to look at in her earlier days. I was inspired by this blog, which offers a nice tutorial on how to make your own mobile using felt.

I made eight squares each in black and white, and then used the rest of the felt to come up with some geometric patterns.


Each square uses two pieces of felt in the background color. I used fusible interfacing in between to make them stiffer, and then used embroidery thread in the contrasting color to stitch the pieces together. 

I initially tried to use a hot glue gun to attach the smaller pieces of felt for the pattern, but then ended up going over most of them in embroidery thread, anyway. This made it a bit challenging to get the needle through the layers, in places. Next time I'd skip the hot glue and just slog away with the embroidery thread. 


Next I attached each square to a clear shower curtain hook using fishing line. 

The only problem is that this mobile has attracted an unintended user. Why is it that all baby items are irresistible to cats? Here is Leo testing it out. 


Sunday, August 4, 2013

Nine Months of Crafting: DIY "Boppy"


(Jordynn here). So, people seem to either love or hate the nursing pillow (such as the "Boppy" or the "Brest Friend." Seriously.) Some people say they couldn't live without one, while others find them unnecessary or unhelpful--probably depending on the position you prefer to nurse in, your own anatomy, the chair you use, etc. So I decided not to get one. (I was also wary of the polyurethane foam they use for these types of nursing pillows, 80% of which may be treated with flame retardants.) 

But then I realized I could just make one. I mean, it's a pillow. I've made pillows before. And I happened to have fabric on hand from other projects I was meaning to do. 

So I found this pattern online and again put my meager hand sewing skills to work. (Sewing machine still broken). Here's how it turned out: 

Again, you can see I'm not exactly a pro sewer. The seams look lumpy. It's not perfect. But I think it will do the job. 

First, I stuffed it with polyester stuffing (shown in pictures), but then I realized that's not necessarily the greatest either, environmentally speaking. After some research, I found a few options for organic/non-toxic stuffing materials. I ordered a box of kapok filling here, which is apparently popular with the yoga set for making meditation pillows. Kapok stuffing comes from a tree, and apparently has a fluffy, silky texture. But since I wanted to finish the pillow RIGHT NOW, I also found a source for natural buckwheat hulls that was local. I picked up 10 pounds of hulls in person and used about 6 of it to stuff the pillow. The buckwheat hulls give the pillow more of a beanbag texture, which is nice because the hulls shift around to conform to your body. 

[Yes, I'm becoming a slightly obsessive first time mother. I ordered an organic mattress, bassinet pad, and changing pad. Not everything is organic (certainly not all of her clothes), but you do what you can.] 

The pattern includes instructions for making a separate washable cover. I debated making the pillow itself in muslin and then making a separate cover, but I was lazy. I figure I can make another cover if needed, or make a whole new pillow. This was finished in an evening, even with hand sewing, and once I fix my stupid machine this could be done in an hour or less. 


Update: Here's how it looks with the buckwheat stuffing: 


Also: I got a new camera. Can you tell? I'll have some new knitting pictures to show it off soon! 

Friday, August 2, 2013

Nine Months of Crafting: Newborn Art Cards

I decided to do this project because I wanted something simple to put beside Peapod for her to look at in her first few months. They sell various kinds of art cards in black and white for infants, such as these ones, but they are hard to prop up (or you have to tape them to the wall or something). Plus, I like to be thrifty. So I decided I would make some little cards using poster board.

The first set is black and white patterns:

Apparently babies like faces, so I drew some on the opposite side.

The next step for infant vision is to learn to distinguish colors, so I made the next set in shades of warm colors (on one side) and cool colors (on the other).

I used scrapbooking paper, which has been put to use for several of the projects in the nursery, beginning with my closet organizer/divider project.

More projects coming all this week!


Wednesday, July 31, 2013

Nine Months of Crafting: Tiny Kimono Shoes


(Jordynn here). Okay, so this is a sewing project, not a knitting project, but I wanted to share these little shoes I made. You can see they aren't perfect--the seams are kind of lumpy. I think that's due to 

a) the bulky layers I stitched together--the shoes include a muslin liner, outer fabric, and fusible interfacing for stiffness. 
b) the fact that I hand sewed them, as my machine is on the fritz
c) the difficulty of turning all those layers inside out after stitching 

But, I think they are cute and they happen to match a little outfit I got as a shower gift. I have no idea if the size will be right or if they will stay on her little feet, but they were fun to make with my sewing friend, S. 


I used this free pattern to make the shoes. Maybe it is because I am a novice sewer, but I found this pattern confusing but just kept following the steps, and wound up figuring it out. This has been the story for most of my sewing projects thus far: I'm always skeptical that things will turn out right, until they do (mostly). It was a bit unclear how to pin and sew the top of the shoe to the bottom, especially since I wanted the colors to be mirrored, but I figured it out. I might make this again, in a polar fleece or something that won't require interfacing.


Monday, July 29, 2013

Nine Months of Crafting: Nursery Artwork

(Jordynn here). The artwork for the baby's room is mostly DIY, except for the two owl paintings (above the shelves), which I found at TJ Maxx. 


My mom and I collaborated on this bird painting, which is above the crib. First, we used art tape to lay out the wire lines on the canvas, and then she painted the the background using acrylics, while I cut out the bird shapes from scrapbooking paper. After arranging the birds, I used Mod Podge (best craft item in the world) to affix them to the canvas, and then coated the whole thing with more Mod Podge. Finally, my mom drew on the feet with a silver marker. 


The ABC pictures are also made with scrapbooking paper. I just downloaded letter and animal shape silhouettes and traced them onto paper.


Then, I used (you guessed it) Mod Podge to attach them to the background paper, and went over the whole thing again with Mod Podge.

I kind of think they should be in bigger frames, and not so high up from the dresser. But, since I'm using that as my changing area, I guess they should be out of reach for practical reasons. Still, I think they look cute, and it was an easy and quick craft to do.


Saturday, July 27, 2013

FO (Mostly): Nursery

(Jordynn here). So I have about 3 weeks to go (give or take) and the nursery is pretty much in order. There are lots of DIY projects here, so I thought I'd post an overview today and then go into more detail in subsequent posts.


The inspiration for the nursery colors came from a stack of quilts and blankets (some of which you can see below). My mom made the two red quilts for the nursery my sister and I used as babies, and she crocheted the white blanket to take us home from the hospital. (Peapod will be going home in the same blanket.) The pink, blue, and green blanket was my well-loved "Kanky" as a kid. I also have my husband's yellow, blue, and green blanket (not shown) in the stack. I thought it would be nice to use these to create a gender neutral nursery, along with some other things I'd collected--my "Abby" doll (the Raggedy Annie shown on the shelf, which my mom also made), some vintage Fisher Price toys, and some other items (like the vintage pale blue fan on the shelf, which I got at a thrift store back in grad school). I wanted a vintage-meets-modern feel to the room.


Aside from the crib, which was a gift, I didn't have to purchase any of the furniture shown here, although I do have a comfy rocking chair on order.  I've had the shelves since my first graduate school apartment, and the dresser came from a thrift store and was previously in the guest room. It was originally a walnut color, but my mom and I painted it white for a cleaner look. I love how it fits in the nursery. The Ikea rug came from eBay. I was a bit unsure of it at first, but I think it ties everything together nicely.


The yellow rocking chair shown in these pictures came from an old farm house and used to be in our basement. I gave it a coat of yellow paint a few years ago. It may or may not stay here when the new comfy chair comes in, or it might get a new coat of paint.

The red lamp came from a thrift store and has been around since grad school--it's been a living room piece, an office lamp, and is now in the nursery.


I've already blogged about the blue Connect Four blanket shown above, and the Peapod Pouf that I made.

The projects I'll blog about next week:

1) A DIY "Boppy" type pillow (shown on the yellow rocking chair)
2) The ABC artwork shown above the dresser
3) The blue bird painting (a collaboration with my mom), above the crib

I've also got a few other little crafty projects to post about soon.


Thursday, July 4, 2013

Nine Months of Knitting: Peapod Hat

This little hat was a quick knit, and it turned out well!


I wanted this to be a bit smaller than the pattern called for so I can put it on Peapod in the hospital instead of those gross grungy hats they give you. So instead of the original cast on amount, I cast on 63 stitches and then followed the pattern as written.

I used Lion Brand Martha Stewart Crafts Extra Soft Wool Blend (that's a mouthful!). I actually quite like this yarn--it is soft, but has wool for body.


More knitting and crafting projects coming soon. 41 days of knitting left!


Saturday, June 29, 2013

Nine Months of Knitting: Three Little Sweaters

So, I am nearing the home stretch, in my 33rd week of pregnancy, and I'm finishing up some projects for the baby, knitting and otherwise. Here are three little sweaters that I've made for Peapod (who still doesn't have a name!).

They are, from left to right: Garter Yoke Baby Cardi (in yellow), Tiny Tim sweater (in blue-green), and a new sweater pattern that I made to match the Bibendum booties I posted about last time.

First, the Garter Yoke Cardi. I used Lion Brand Cotton-Ease, which I love for baby knits. The color, maize, matches a little onesie I bought a while back for Peapod. I'll be sure to post photos when she grows into this--about a 6-12 month size. I added multicolored buttons in red, yellow, and green.


     I used these instructions from Chronicles of Yarnia for adding a hood to the sweater, and I decided to just knit the whole thing in garter stitch because I wanted a nice, cushy, textured sweater. For more details, see my Ravelry post.


The quilt in the background is from my nursery when I was a baby--my mom made it! I love it.

Next is a Tiny Tim sweater, which I have made three times before. This time, I made it as a cardigan. To do so, I just built in a garter stitch placket, adding buttonholes about every 8 rows.


I still love the back of Tiny Tim, and I love the stitch definition of the (now discontinued) Moda Dea Washable Wool that I used for this sweater. This was a stash yarn that I've had on hand for years! More info on my Ravelry page.


Finally, for the Bibendum sweater I used the same organic cotton from Lion Brand that I used for the booties. I think Katie gave me this yarn years ago. It is finally getting used up for these little projects.


This is a simple top-down sweater, using a garter stitch pattern similar to the top of the Bibendum booties. I'll post a full pattern soon! For now, here's my Ravelry project page.

You can see that the nursery is coming along.  I chose a multi-colored, gender neutral color scheme because we are planning on having at least one more baby, and I happen to love these bright colors over the somewhat sickly pastels that seem to be popular for nurseries. Here's a work-in-progress photo:


You can see that I've made a few art projects, too, which I will post about soon.

Friday, June 21, 2013

Nine Months of Knitting: Little Booties


These little booties are from the pattern Bibendum, which is free on Ravelry.  

I made them using some Lion Brand Organic Cotton in neutral to go with some of Peapod's newborn size outfits. The pattern is easy and the booties look like they might actually stay on. We'll see how well they do on actual newborn feet!

Here they are before I added ribbons: 

For more details, see my Ravelry page

Thursday, April 18, 2013

Nine Months of Knitting: Cables in a Weekend Blanket


Okay, this might not look like a baby project, but it is! The pattern is Cables in a Weekend, which is a great, quick baby blanket pattern. I made mine out of some Malabrigo Chunky in Applewood.

I wanted something I could put on the floor for Peapod to play on, and this soft squishy yarn is perfect. But I also wanted to be able to throw it over the couch and not look out of place in the TV room. Hence, no baby yarn that looks like unicorn poop for me. It looks nice in the room, and I'm sure Peapod will enjoy it along with the Peapod Pouf I have in there.

You can read more at my Ravelry project page here.

More baby projects coming soon! I've been on a much-needed Babymoon in Puerto Rico, but I have three sweaters finished and a pair of booties ready to post about soon. Baby belly below.


Saturday, March 30, 2013

Nine Months of Crafting: Closet Markers

In addition to knitting up a storm, I've started a few craft projects for the baby's nursery. I've seen these size markers for baby closets, such as the ones sold here. But I thought I could make some myself. I went to the local craft store and browsed the aisles for something that would work. I came up on these mini clip-boards, which are sold on these little chains:


I bought four packages (2 in a package), because I needed 7 markers for sizes 0, 3, 6, 9, 12, 18, and 24 months. I got some scrapbooking paper in colors to complement the nursery color scheme, and some Mod Podge:


And some wooden numbers. They were out of 1's, so I grabbed an I and later shaved it off a bit to look like a 1. 


To make size markers from 0 (newborn) up to 24 months, you'll need: 0, two 1's, two 2's, and one each of 3, 4, 6, 8, and 9. 

Next, I made a template and cut pieces of scrapbook paper (two for each clipboard) ...


and modpodged them on. 


I painted the wooden letters white, and then attached those using ModPodge.  Here's what I came upt with:


And here's what they look like in the baby's closet:


I'll show you what the closet now looks like in a few days... because it's a girl, and I couldn't help getting a few pieces to add to the gender neutral items I've collected.


Saturday, March 23, 2013

Nine Months of Knitting: Sailor Stripe Set

I made this little sweater set using two patterns I've made before: Little Coffee Bean Cardigan and Pimp My Longies. (See previous FO's here, here, and here).


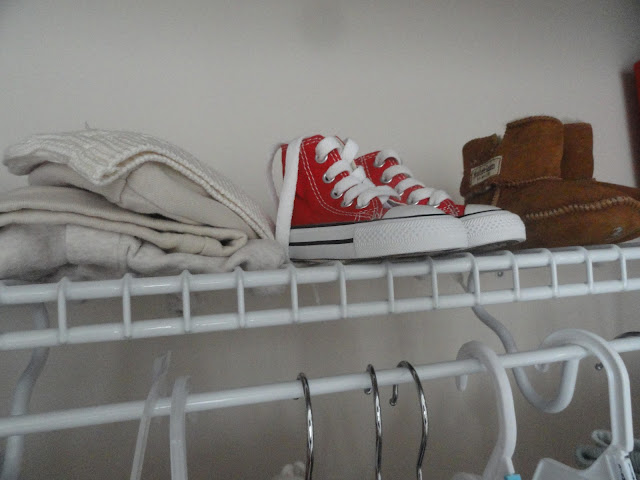
I also used one of my favorite yarns for baby stuff, Lion Brand Cotton-Ease. For a cotton yarn, it holds together well (minimal splitting) and it has good stitch definition. I like the nautical blue and cream colors for a gender neutral little outfit. I figure I'll put it with little red maryjanes and a red onesie for a girl, or these cute Chuck Taylor sneakers (for either sex)--which I'm finding out in a few days!


Overall, it turned out pretty well, although the sweater ribbing skews the stripes a bit--I always seem to have this problem with the placket ribbing shrinking in.


 Here, it makes it look like I did an extra half row of stripes on one side (which I didn't). I usually don't decrease in needle size for the ribbing, to try to avoid this, but it still tends to shrink in. Any tips?

See my Ravelry project pages for the Longies and the sweater.


Sunday, March 10, 2013

Nine Months of Knitting: Peapod Pouf

(Jordynn again)

Okay, so this might not seem like a baby project, but I'm considering it one. For now, this Puff Daddy pouf is in the upstairs TV room, where it blends in with my throw pillows. But I'm thinking the baby might like to use it to get used to tummy time as an infant, if it isn't co-opted by my cats first.


I've been wanting to make one of these for a while, since I've been seeing similar items at Crate & Barrel and Target for $50 and up. I'm calling it the Peapod Pouf for two reasons: one, the colorway of the yarn is called Peapod, and two, that's our nickname for the as-yet-unamed baby.


I used nine skeins of KnitPicks Brava Bulky, held triple stranded, and it was an easy and quick knit. I like the chunky texture it creates.

When I was done, I stuffed the pouf with an old duvet I had lying around. I tried to roll it into a smooth ball, but as you can see, it is still rather lumpy. If I were to do it again, I'd try to make a more cylindrical shape, like a sleeping bag, to see if that created a smoother line.

For more details, see my Ravelry page: http://www.ravelry.com/projects/canadianbacon/puff-daddy 


More baby projects coming soon--including some original patterns and an updated cardigan version of Tiny Tim. I have 157 knitting days to go before Peapod's arrival!