I received a message via Ravelry.com about photographing knits. With the writer's permission, I'm reposting the message here:
Hello,
i read your article about photographing knits on your blog and wanted to ask you a question.
i am thinking of starting a blog soon and want to take better pictures of my work. problem is i have never really liked posing for photographs and don't wish to subject others to the same, hence no camera.
i was wondering if my phone would work? it has a 5 MP camera with resolution of 2592x1944 pixels.
Thank you
The knitter poses a few important questions. I'll rephrase them here so I can answer them all.
(1) First, she talks about a common concern that many knitters share--modeling their own knits on the internet. For a variety of reasons, folks just don't want images of themselves online.
(2) Second, this would-be blogger doesn't own a fancy camera, which might pose a challenge as well.
(3) Third, she would like to know how to use the phone on her camera to take good pictures for her blog.
Okay! We can handle all of these challenges. Let's get to it.
(1) Modeling Knits
I totally understand that you might not want to model your own knits on the internet. I can also understand that you might not want to ask other people to model them for you. So what do you do?
Here are some ideas:
(2) What Kind of Camera?
I wrote an earlier post in which I discussed the best type of camera for taking pictures of knits. If you want to learn more about the technical aspects of cameras and photographing knits, hop over to that post.
(3) Using the Cell Phone Camera
These days, cell phones come with great cameras. Here are a couple ideas to keep in mind when taking pictures using your cell phone camera.

(1) Modeling Knits
I totally understand that you might not want to model your own knits on the internet. I can also understand that you might not want to ask other people to model them for you. So what do you do?
Here are some ideas:
- My favorite: Buy a dress-form in your size. A dress-form is a great thing for a knitter to have anyways, not just for modeling knits. You can use it for blocking, for construction, for measuring, etc. etc. But you can also use it to display your knits when you want to photograph them. Find a vintage one at a thrift shop or buy a new one from a sewing shop (but these can be pricey).
- Ask your friends to model, even if you think they might say no--you'll be surprised! Some people love having their pictures taken. My little sister modeled my knits for me when I was pregnant. She loved doing it! I was completely surprised because she's not a knitter and wasn't a part of the knit-blog community in any way--but she was happy to help me out. Here she is modeling my Liliane sweater coat, for example.
(2) What Kind of Camera?
I wrote an earlier post in which I discussed the best type of camera for taking pictures of knits. If you want to learn more about the technical aspects of cameras and photographing knits, hop over to that post.
(3) Using the Cell Phone Camera
These days, cell phones come with great cameras. Here are a couple ideas to keep in mind when taking pictures using your cell phone camera.
- Angles are your friend. Shoot your knits up-close and at steep angles to maximize your cell phone camera's lens. Below is a photograph of Chopin that I took at a steep angle to show you what I'm talking about.
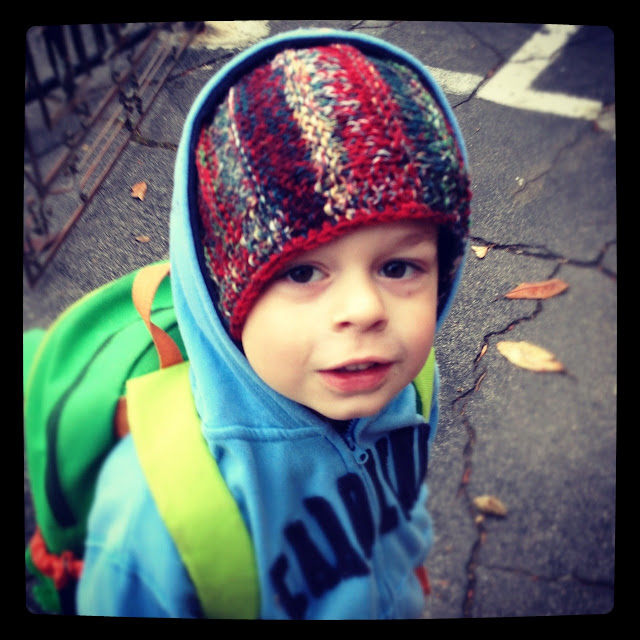
- Use a filter app. Instagram is my favorite--it's an app that allows you to apply fun filters to your photographs to enhance images. Plain-Jane photographs can become super-fun when taken with Instagram. Below one I just took of my son wearing a hat I knit for him. I used Instagram to blur the background and to enhance the contrast of the photo. Instagram also added the black border.
And that's my advice on photographing knits for today. I'm sure I'll think of more. If you have other questions, feel free to message me on Ravelry and I'll answer your questions here.
- Katie Rose


