Wednesday, April 24, 2013

Apparently It's a Moth-Party

So, I pulled out another shrug to wear today and was horrified to find more moth holes.

But not just one or two. FIVE. FIVE moth holes. In one sleeve. Someone had a moth-party on my sweater. Apparently Cascade 220 is just DELICIOUS.

Moth-Party! Wee-Hee! Sigh. 

I'm going to try to salvage the sweater because I love it and because I am a very stubborn person.


Here's another hole. There are two more I'm not showing you. You've seen enough.
Here's the shrug. It's called Dalloway. It's one of my own designs, and you can download it from Ravelry.

Yes, I'm wearing a nursing tank-top in this photograph. Wow, that was a long time ago.

Anyways, I didn't notice the holes at first because the darn thing is covered in eyelet lace. But now I'm sitting in a cafe and every time I look at my sleeve I want to scream. Stupid moths. 

- Katie Rose (keeping it together, not screaming, blogging instead)

Friday, April 19, 2013

Moth Holes--What to Do?

Early in our marriage, when we were moving out of a ramshackle rental house and into the first house we ever owned, a mouse ran across the living room as we were packing the truck. At first, Michael didn't say anything because he didn't think I'd seen it.

"Oh, look, a mouse!" I said. And added something like, "How cute!"

"Um, really?" Michael said.

Translation: "You go bat-sh*7 crazy whenever there are bugs in the house, but mice are A-OK?"

My response: "I go crazy when there are two kinds of bugs in the house: roaches, because GROSS, and moths."

MOTHS. BECAUSE I KNIT.

Zoom forward 6.5 years.

It's finally spring around here, after that atrocious fake-spring that was really winter with a bad attitude that we've all been experiencing, and spring means SHRUGS. Yes, shrugs, my favorite knitted item in the world.

I pulled out this one to wear today:

My Blue Two-Tone Ribbed Shrug designed by Stefanie Japel

And freaked out to discover this:

Horrifying Moth Hole Discovered This Morning
So I thought I'd share with you my three rules of darning knits.

(Warning: Darning purists out there, you might as well navigate away now, because this post might freak you out as much as moths do.)

Here are the tools I grabbed to darn this hole:

Darning Tools: Scissors, Matching Thread, and a Sewing Needle

So, here's what you'll need to darn a moth hole, quick-and-dirty Knitty Professors Style:

(1) Thread that matches PERFECTLY. This is the only thing that you have be precise about, people. Take your knitted item to the sewing store and buy the closest thread that you can find. Err on the side of something a little darker. Get a nice sewing lady to help you if you can't decide on a color.

(2) A sewing needle that works with your thread.

(3) Scissors.

Let's take a look at how the hole looks after I darned it:

The Darned Hole (LOL)

So, let's break this darn thing down, shall we? 

The first thing you notice is that this darning job is NOT PERFECT. I've blown this image up way large, zoomed way in, and used a high-contrast photo filter to bring out the details. But even still, it's not perfect.

The point of darning (1) to prevent the hole from getting bigger and (2) to make your sweater pretty and wearable again. That's it! It's never going to be "like new" because it had a BIG OL' HOLE in it. So, lower your expectations, and you'll be a lot happier.

Now, I think this came out pretty good, plus the darn is super-secure and the fabric won't unravel. Here are some tips to make sure your darn is sturdy and workable as well:

(1) Always darn with the GOOD side up. For those of you who sew, this is backwards! Weird! I know. But that's how you do it.

(2) Be sure to pass the needle through stitches that are NOT all moth-shredded. In other words, anchor the thread into stitches that are solid. That means that you'll have to grab wider out from the hole than you'll want to, most likely. OH WELL. Fix that hole! It's okay! No one will notice, I swear.

(3) Don't worry about the thread showing. Remember how you picked a thread that matches EXACTLY? It doesn't matter if it shows! Because it matches! 

(4) If you can pass the needle through the back of a stitch, you know, the little bar that runs behind the stitches that you can see, then you have a better chance of hiding the sewing that you are doing and keeping the stitches behind the work. 

(5) I tend to work from the bottom of the hole to the top of the hole, running with the knitting work. Never work side-to-side. That's crazy. 

(6) Once you've tied of the thread nice and securely (do THAT on the back of the fabric), use a steam iron to puff up the stitches around the darn. Plus, the moisture will cause the wool to get all grabby and will help anchor the darn. Good stuff.

That's it!

In case you were wondering, here's what it looks like without the high-contrast, super-zoom filter. Now I just need to find that pumice stone for all those pills:

Darn it, people!

- Katie Rose

Thursday, April 18, 2013

Nine Months of Knitting: Cables in a Weekend Blanket


Okay, this might not look like a baby project, but it is! The pattern is Cables in a Weekend, which is a great, quick baby blanket pattern. I made mine out of some Malabrigo Chunky in Applewood.

I wanted something I could put on the floor for Peapod to play on, and this soft squishy yarn is perfect. But I also wanted to be able to throw it over the couch and not look out of place in the TV room. Hence, no baby yarn that looks like unicorn poop for me. It looks nice in the room, and I'm sure Peapod will enjoy it along with the Peapod Pouf I have in there.

You can read more at my Ravelry project page here.

More baby projects coming soon! I've been on a much-needed Babymoon in Puerto Rico, but I have three sweaters finished and a pair of booties ready to post about soon. Baby belly below.


Saturday, March 30, 2013

Nine Months of Crafting: Closet Markers

In addition to knitting up a storm, I've started a few craft projects for the baby's nursery. I've seen these size markers for baby closets, such as the ones sold here. But I thought I could make some myself. I went to the local craft store and browsed the aisles for something that would work. I came up on these mini clip-boards, which are sold on these little chains:


I bought four packages (2 in a package), because I needed 7 markers for sizes 0, 3, 6, 9, 12, 18, and 24 months. I got some scrapbooking paper in colors to complement the nursery color scheme, and some Mod Podge:


And some wooden numbers. They were out of 1's, so I grabbed an I and later shaved it off a bit to look like a 1. 


To make size markers from 0 (newborn) up to 24 months, you'll need: 0, two 1's, two 2's, and one each of 3, 4, 6, 8, and 9. 

Next, I made a template and cut pieces of scrapbook paper (two for each clipboard) ...


and modpodged them on. 


I painted the wooden letters white, and then attached those using ModPodge.  Here's what I came upt with:


And here's what they look like in the baby's closet:


I'll show you what the closet now looks like in a few days... because it's a girl, and I couldn't help getting a few pieces to add to the gender neutral items I've collected.


Saturday, March 23, 2013

Nine Months of Knitting: Sailor Stripe Set

I made this little sweater set using two patterns I've made before: Little Coffee Bean Cardigan and Pimp My Longies. (See previous FO's here, here, and here).


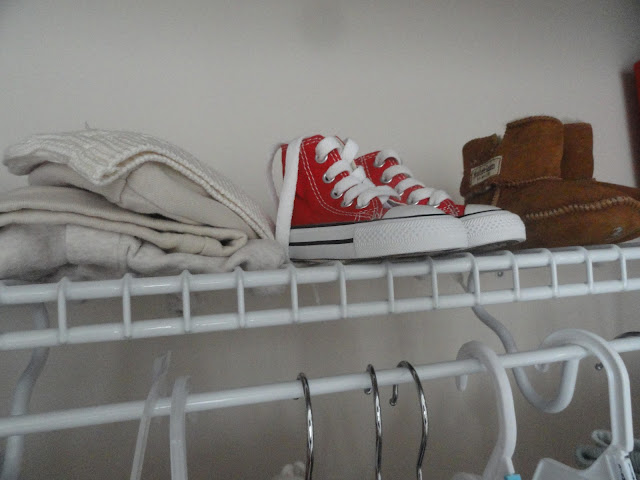
I also used one of my favorite yarns for baby stuff, Lion Brand Cotton-Ease. For a cotton yarn, it holds together well (minimal splitting) and it has good stitch definition. I like the nautical blue and cream colors for a gender neutral little outfit. I figure I'll put it with little red maryjanes and a red onesie for a girl, or these cute Chuck Taylor sneakers (for either sex)--which I'm finding out in a few days!


Overall, it turned out pretty well, although the sweater ribbing skews the stripes a bit--I always seem to have this problem with the placket ribbing shrinking in.


 Here, it makes it look like I did an extra half row of stripes on one side (which I didn't). I usually don't decrease in needle size for the ribbing, to try to avoid this, but it still tends to shrink in. Any tips?

See my Ravelry project pages for the Longies and the sweater.


Monday, March 18, 2013

New Fabric for Atomic Chairs

We finally got our chairs back from the upholstery folks. They look great. And now that there's actually a cushion, they feel great, too.


Also, Adrian likes them. But, he says, "They're not too bouncy."


- Katie Rose

Sunday, March 10, 2013

Nine Months of Knitting: Peapod Pouf

(Jordynn again)

Okay, so this might not seem like a baby project, but I'm considering it one. For now, this Puff Daddy pouf is in the upstairs TV room, where it blends in with my throw pillows. But I'm thinking the baby might like to use it to get used to tummy time as an infant, if it isn't co-opted by my cats first.


I've been wanting to make one of these for a while, since I've been seeing similar items at Crate & Barrel and Target for $50 and up. I'm calling it the Peapod Pouf for two reasons: one, the colorway of the yarn is called Peapod, and two, that's our nickname for the as-yet-unamed baby.


I used nine skeins of KnitPicks Brava Bulky, held triple stranded, and it was an easy and quick knit. I like the chunky texture it creates.

When I was done, I stuffed the pouf with an old duvet I had lying around. I tried to roll it into a smooth ball, but as you can see, it is still rather lumpy. If I were to do it again, I'd try to make a more cylindrical shape, like a sleeping bag, to see if that created a smoother line.

For more details, see my Ravelry page: http://www.ravelry.com/projects/canadianbacon/puff-daddy 


More baby projects coming soon--including some original patterns and an updated cardigan version of Tiny Tim. I have 157 knitting days to go before Peapod's arrival!